
Amplify Shader Editor
Every effect in the asset is available as an Amplify Shader Editor (ASE) node, not only as a Shader Graph subgraph. The workflow is the same one described in Chaining Node Effects: drop the node in, feed it its inputs, chain the output into the next one.
If you don’t own Amplify Shader Editor you can get it here: https://assetstore.unity.com/packages/tools/visual-scripting/amplify-shader-editor-68570?aid=1101l52IjU
Importing the Compatibility Package
Section titled “Importing the Compatibility Package”The nodes are there from the start, but the ASE templates, demo shaders and demo scene are not: they would be broken assets for customers who don’t own Amplify. They ship as separate packages instead, in the ASE Compatibility Packages folder in the asset root:
- AmplifyShaderEditorCompatibility_BIRP: import this if your project uses the Built-In Render Pipeline.
- AmplifyShaderEditorCompatibility_URP: import this if your project uses the Universal Render Pipeline.

Import only the package that matches your current Render Pipeline. Each one contains the three ASE templates for that pipeline, the demo shaders, the demo materials and prefabs, and the ASE demo scene, which lands at:
Assets\Plugins\AllIn1Assets\AllIn1ShaderNodes\Demo\Demo-AmplifyShaderEditor.unity
ASE Templates
Section titled “ASE Templates”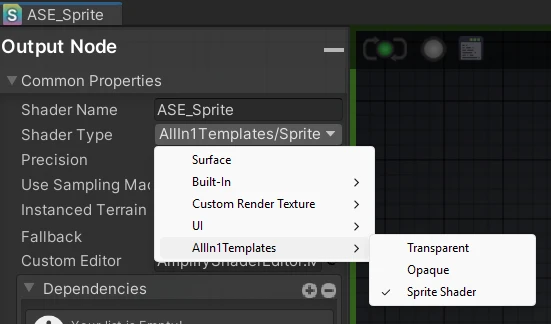
The compatibility package installs 3 ASE templates, and they are required for the nodes to work correctly. Using them ensures that the output node is properly configured and that the default values of the All In 1 nodes are set up automatically. You will find them under Editor/ASE Templates, in a folder named after your pipeline (ASE Shader Templates - BIRP or ASE Shader Templates - URP). The templates are:
- Transparent: Sets the Render Queue to Transparent and configures the output node for transparent rendering. Use this for any material that needs transparency such as glass, holograms, fading effects and similar use cases. This template includes fog and shadow support.
- Opaque: Sets the Render Queue to Geometry and configures the output node for opaque rendering. Use this for solid materials that don’t require any transparency. This template includes fog and shadow support.
- Sprite Shader: Specifically designed for sprites and 2D elements. This template includes fog support and a Sprite Data setup that automatically handles sprite-specific configurations. The Sprite Data node will automatically fetch the texture assigned to the Sprite Renderer’s Sprite slot and the Color property from the Sprite Renderer component. This means that the shader will use the sprite and tint color directly from the Sprite Renderer without needing to manually assign them in the material. Note that the Sprite Data node will only work within this template and is not compatible with the Transparent or Opaque templates.
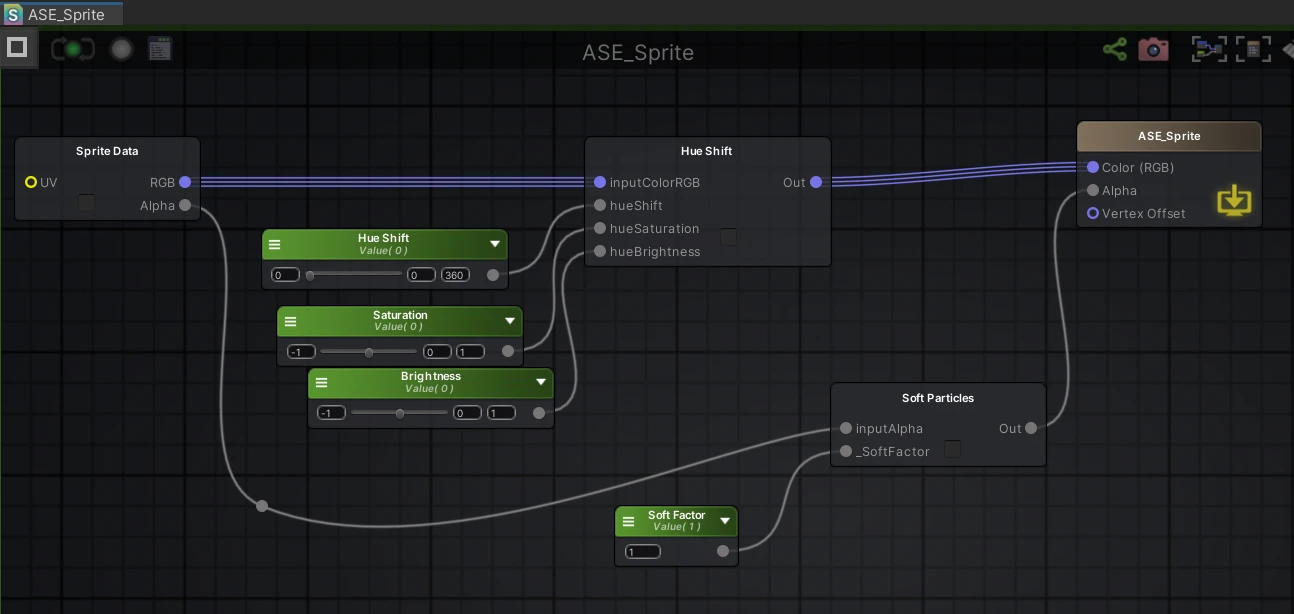
It is important to always use one of these 3 templates when working with the All In 1 nodes. Without them, the default values of the nodes won’t be configured correctly and the auto setup functionality won’t work as expected. If you create an ASE shader without selecting one of these templates, the nodes may produce unexpected results.
Using the Nodes
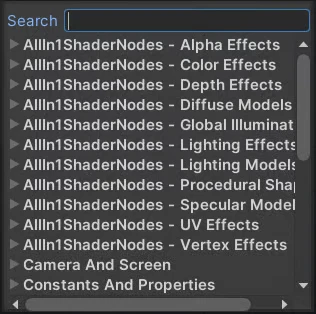
Section titled “Using the Nodes”To add an All In 1 node to your ASE graph, open the node creation menu and search for the
effect you need. All nodes are grouped under categories prefixed with
AllIn1ShaderNodes - (AllIn1ShaderNodes - Color Effects, AllIn1ShaderNodes - UV
Effects, and so on), so typing AllIn1 lists the whole library.
Two things to keep in mind when moving between the two editors:
- A handful of nodes are named slightly differently in ASE. Distortion UV is UV Distortion, Fade - Classic is Fade, Circle SDF is SDF Circle, and so on. The Effects Breakdown lists both names for every node that differs.
- The lighting nodes are spread over three categories. AO Map, Ambient Color, Reflections and Reflections Toon are under AllIn1ShaderNodes - Global Illumination, Normal Map is under AllIn1ShaderNodes - Lighting Effects, and Full Light Model is under AllIn1ShaderNodes - Lighting Models.
Default values can also differ between the two backends: both editors ship each effect with values that look good out of the box, but they are not always the same number. The Effects Breakdown lists the Shader Graph defaults.
To learn how to chain and combine multiple effect nodes together, refer to the Chaining Node Effects section of the Documentation. The workflow for connecting and stacking effects is essentially the same in Amplify Shader Editor as it is in Shader Graph.