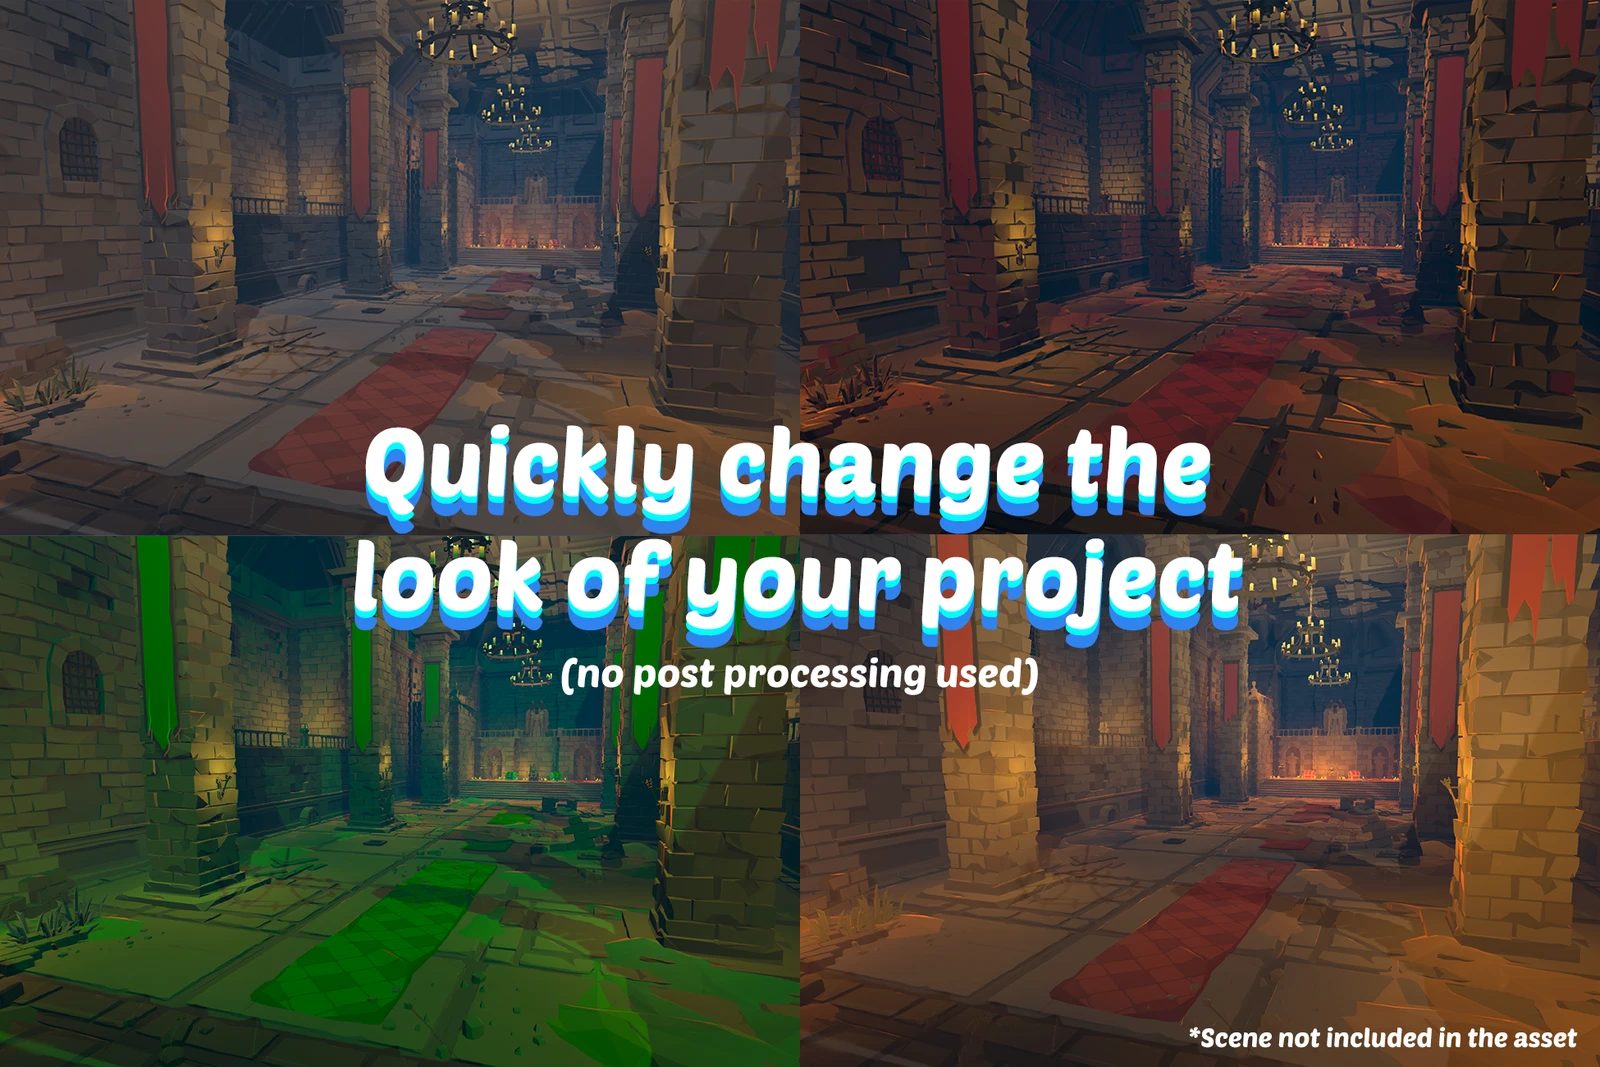
Batch Override Materials
The Batch Override Materials feature is a powerful tool that allows you to quickly modify multiple materials in your project simultaneously. This feature significantly accelerates your workflow when experimenting with different visual styles or making project-wide adjustments to your 3D assets.
Where to find it
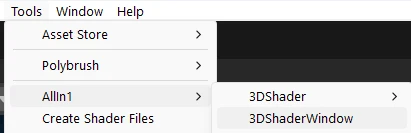
Section titled “Where to find it”You can access this tool through the asset-window (Tools → AllIn1 → 3D Shader Window) under the Override Materials tab:

What you can change
Section titled “What you can change”With this feature, you can:
- Select your scope - Choose to apply changes to materials in specific folders, the entire project, or just the current open scene
- Preview changes non-destructively - Experiment freely with placeholder previews before committing any modifications
- Batch toggle effects - Enable or disable specific effects across multiple materials at once
- Modify properties in bulk - Change property values across all selected materials simultaneously
Why it is worth using
Section titled “Why it is worth using”This tool is invaluable for quickly iterating through different visual styles for your entire game. Whether you’re trying to find a unique aesthetic that sets your project apart from the competition or need to make consistent adjustments across your assets, the Batch Override Materials system streamlines the process.
The non-destructive preview system ensures you can experiment freely without risk - changes are only applied when you explicitly confirm them, protecting your original materials until you’re satisfied with the results.
For visual effects artists and technical artists in particular, this feature dramatically reduces the time needed to experiment with different looks and find the perfect visual style for your project. Instead of tediously adjusting each material individually, you can make broad changes and then fine-tune as needed.
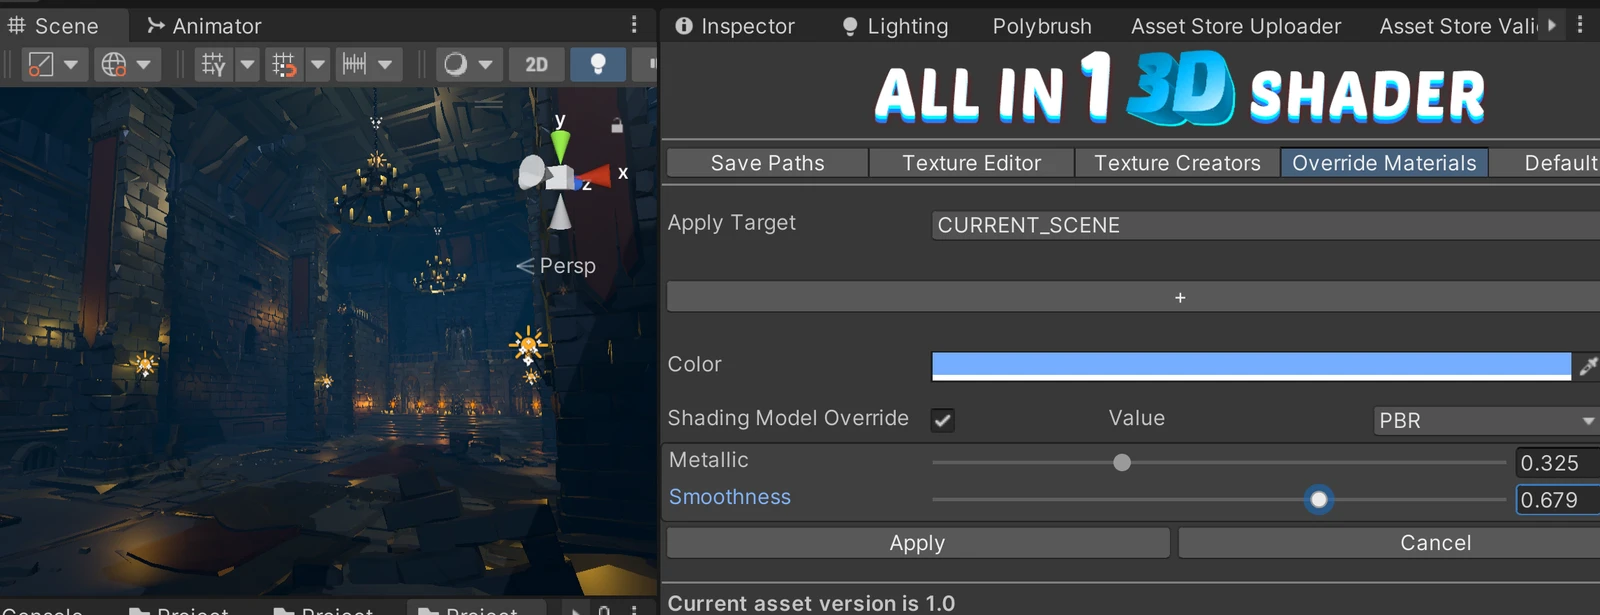
For example here, in this scene that isn’t part of the asset, I quickly changed it to a blue hue and enabled reflections across the screen:
Using the tool
Section titled “Using the tool”To use the tool press the + sign, this will open a popup, select the property you want to add:
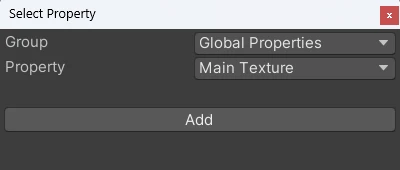
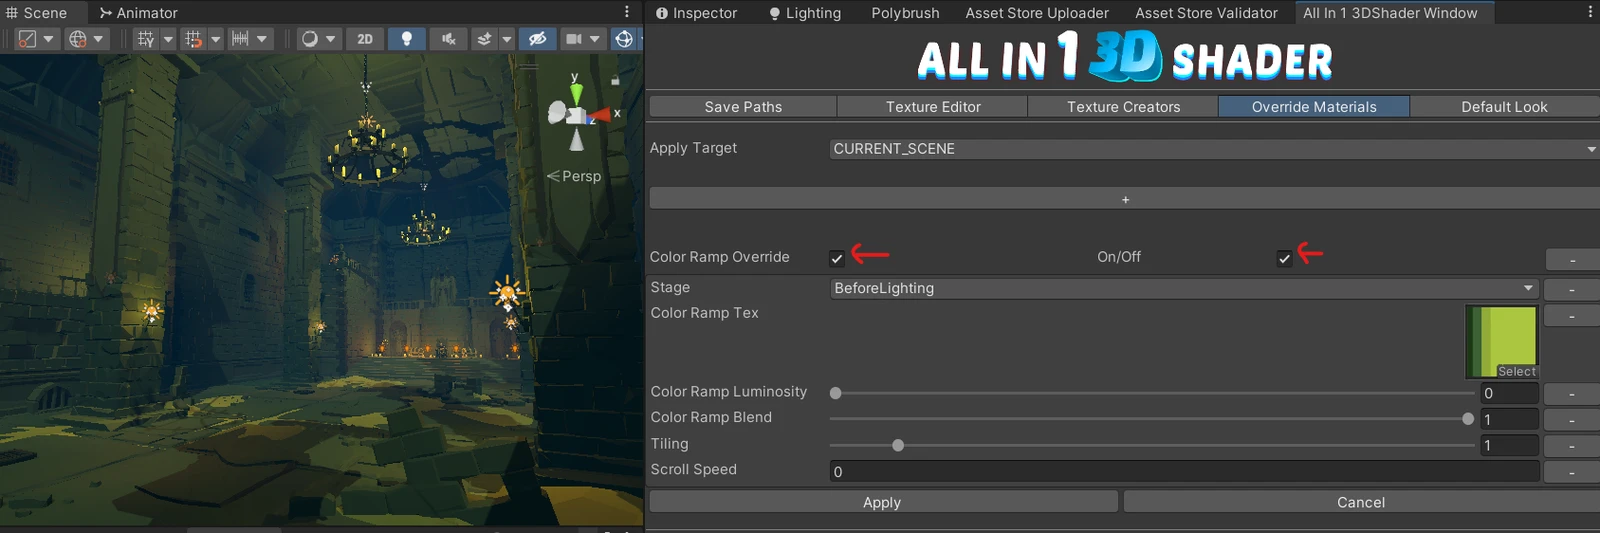
The property will then appear in the Asset Window and will allow you to edit it. If you add a property, say ColorRamp you can force it to be enabled on all materials with these 2 toggles. Otherwise you’ll just edit the materials whose Color Ramp is enabled.
More examples
Section titled “More examples”Finally some more examples done withe the tool: